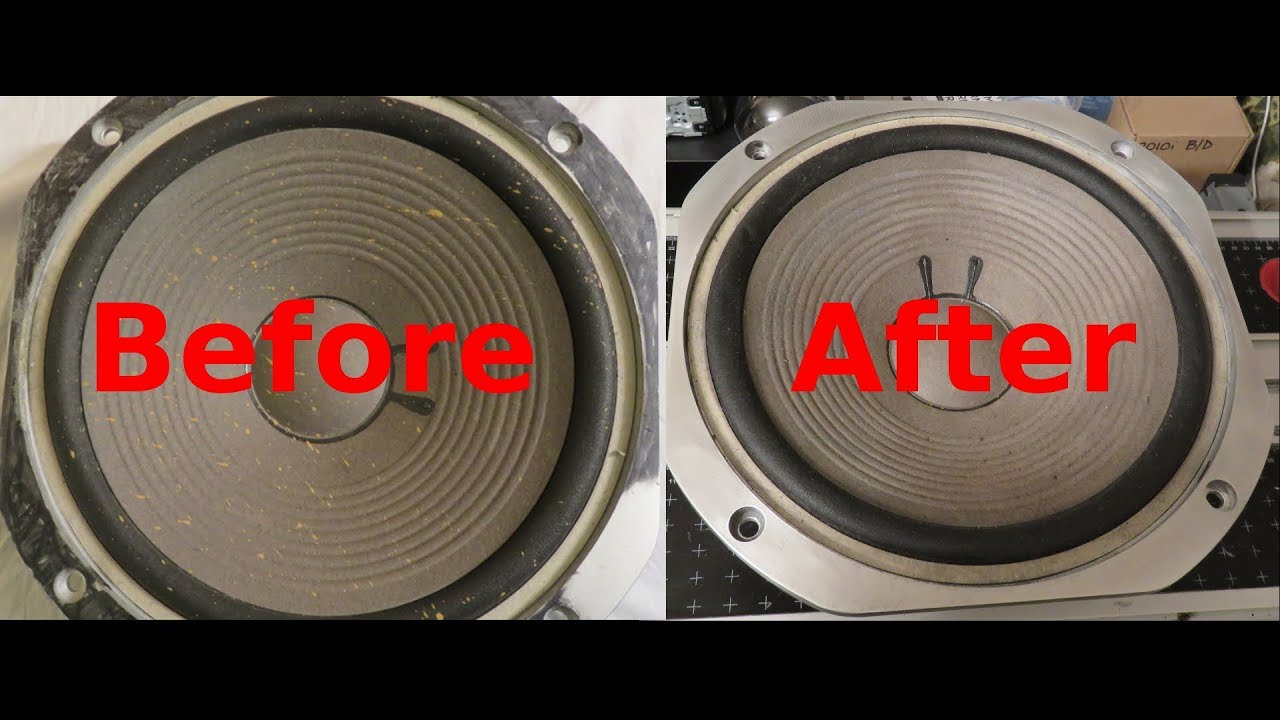
How to Clean Dirty Speaker Cones?
Speaker cones can get pretty dirty, and when they do, it can affect the quality of the sound coming from your speakers. There are a few different ways that you can Clean Dirty Speaker Cones, and the best method will depend on how dirty they are. If your speaker cones are only lightly soiled, you can simply wipe them down with a damp cloth.
For more stubborn dirt and grime, you may need to use a mild soap or cleaning solution. Be sure to rinse the cones thoroughly afterward to remove any residue.
- Unplug the speaker from any power source or audio device
- Gently remove any debris or dirt from the speaker cone using a soft, dry cloth
- If the speaker cone is still dirty, dampen a clean cloth with water and lightly wipe the surface of the cone
- Avoid using any harsh cleaners or chemicals on the speaker cone as this can damage it
- Once the speaker cone is clean, allow it to air dry completely before plugging it back in and using it again
Credit: www.youtube.com
How Do You Clean Dirty Speaker Cones?
If your speakers are looking a little worse for wear, don’t worry – a good clean can have them looking as good as new in no time!
Here’s how to clean dirty speakers:
1. Begin by dusting off the speaker grille with a soft cloth or brush. If there is any built-up dirt or debris, you can use a vacuum cleaner with a soft brush attachment to gently remove it.
2. Next, wipe down the speaker cabinet with a damp cloth. Be sure to avoid getting any water inside the speaker itself – just focus on the surface area.
3. Once the cabinet is clean, you can move on to cleaning the speaker itself. Start by gently wiping down the diaphragm (the moving part of the speaker that produces sound) with a soft, dry cloth.
4. If there is any stubborn dirt or grime on the diaphragm, you can try using distilled water and a cotton swab to remove it. Again, be careful not to get any water inside the speaker itself.
5. Finally, once everything is clean and dry, reassemble your speakers and enjoy your newly refreshed audio experience!
How Do You Restore Speaker Cones?
If your speaker cones are damaged, there are a few different ways you can restore them. Depending on the severity of the damage, you may be able to simply clean and repair the cones, or you may need to replace them entirely. To clean and repair your speaker cones, start by using a soft cloth to remove any dirt or debris.
If there are any cracks or holes in the cone, use a clear adhesive to seal them up. Once the repairs are made, you can then use fine sandpaper to smooth out the surface of the cone. If your speaker cones are severely damaged, you will likely need to replace them entirely.
You can purchase replacement cones at most electronics stores. Be sure to measure the diameter and depth of your existing cones so you get ones that fit properly. To install the new cones, simply remove the old ones and screw in the new ones in their place.
How Do You Clean the Inside Mesh of a Speaker?
Assuming you’re asking about the speaker grille/cover: Tools Needed: -Soft bristled brush (like an old toothbrush)
-Vacuum with small attachment -Can of compressed air (optional) Step One: Remove the Speaker Cover
Most speakers will have a removable cover or grille. This is usually held on by screws, although some may have snaps or other fasteners. Once the screws are removed, the grille should come off easily.
If it’s being stubborn, try running a putty knife along the edge to loosen it up. Be careful not to damage the speaker itself!
Step Two: Vacuum Carefully
Use your vacuum’s small attachment to carefully vacuum around and inside the speaker. Pay special attention to any cracks or crevices where dirt and dust might be hiding. If your vacuum has a setting for “bare floors,” turn it on—this will make sure that suction is strong enough to pull all the dirt out without damaging delicate surfaces.
If there’s still dirt clinging to the mesh after vacuuming, move on to step three.
Step Three: Use Compressed Air This step is optional, but if you have compressed air available, it can help remove any final bits of dirt and dust from hard-to-reach places.
Just point the nozzle at the mesh and give it a blast—be careful not to hold it too close, as this could damage delicate parts of the speaker!
Step Four: Brush Gently with a Soft Bristled Brush Once you’ve vacuumed and blown out all the big pieces of dirt, use a soft-bristled brush (an old toothbrush works well) to gently scrub away any remaining residue. Be sure not to press too hard—you don’t want to damage delicate surfaces! And that’s it! Just replace the speaker cover when you’re finished, screwing it back in place (if applicable), and enjoy your clean speakers!
How Do I Get the Crumbs Out of My Speakers?
If you’re like most people, you probably have a few speakers lying around your house. And if you’re like most people, those speakers are probably full of dust and dirt. But don’t worry, there’s an easy way to clean them out!
First, start by unplugging the speaker from any power source. Then, using a vacuum cleaner with a soft brush attachment, gently vacuum the speaker grille. Be careful not to press too hard or you could damage the speaker.
Next, use a can of compressed air to blow any remaining dust and dirt out of the speaker. Start by holding the can upright and spraying it into the speaker grille. Then turn the can upside down and spray it into the openings on the back of the speaker.
Finally, spray some compressed air into the inside of the speaker (but be careful not to touch any of the sensitive parts!). Once you’ve blown all of the dust and dirt out of your speakers, they should be good as new!
How to clean your speakers
How to Clean Speakers
Your speakers are one of the most important parts of your audio setup, so it’s important to keep them clean and free of dust and debris.
Here are some tips on how to clean your speakers:
1. start by unplugging your speakers from any power source.
2. use a soft, dry cloth to wipe down the speaker cabinet. Be careful not to rub too hard or you could damage the finish.
3. use a vacuum with a soft brush attachment to gently remove any dust or dirt from the speaker grille.
4. if there are any stubborn marks or stains on your speaker grille, you can lightly dampen a cloth with water and mild soap before wiping it down. Always make sure the grille is completely dry before plugging your speakers back in!
Conclusion
If your speaker cones are looking a little dirty, there’s no need to worry. With a few simple household items, you can get them looking good as new in no time. First, start by dusting off the surface of the cones with a soft cloth.
If there is any caked-on dirt or grime, you can use a slightly dampened cloth to gently wipe it away. Be sure not to use too much water, as this could damage the cones. Once the surface of the cones is clean, you can move on to cleaning the inside.
Start by using a vacuum cleaner with a soft brush attachment to remove any dust or debris that may have accumulated inside. If there is any stubborn dirt that won’t come up with the vacuum, you can use cotton swabs dipped in rubbing alcohol to lightly scrub it away. After both the outside and inside of your speaker cones are clean and free of dirt and grime, they should look good as new!