How To Charge Auto Drive Charge Pal With Speaker: Ultimate Guide
Looking to charge your Auto Drive Charge Pal with Speaker? You’ve come to the right place! In this article, we’ll guide you through the simple steps to keep your Auto Drive Charge Pal powered and ready to go. Whether you’re on a road trip or just need some tunes in your car, it’s essential to know how to charge the Auto Drive Charge Pal with Speaker. So let’s dive in and get your device charged up for your next adventure!

How to Charge Auto Drive Charge Pal with Speaker
Introduction
The Auto Drive Charge Pal with Speaker is a convenient and versatile device that allows you to charge your electronic devices on the go while enjoying your favorite music or podcast through its built-in speaker. In order to keep your Charge Pal ready for your next adventure, it’s important to know how to charge it properly. This article will guide you step-by-step on how to charge your Auto Drive Charge Pal with Speaker effectively and efficiently.
1. Gather the Necessary Equipment
Before you begin charging your Auto Drive Charge Pal with Speaker, make sure you have the following equipment ready:
- An Auto Drive Charge Pal with Speaker
- A compatible USB charging cable
- A power source, such as a wall adapter or a computer with a USB port
2. Locate the Charging Port
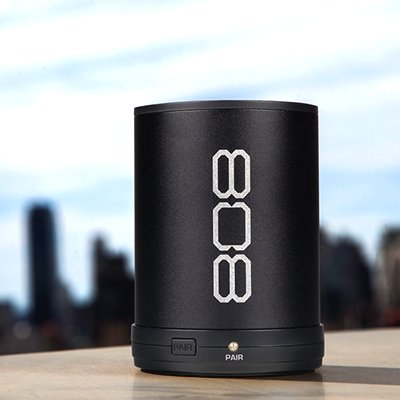
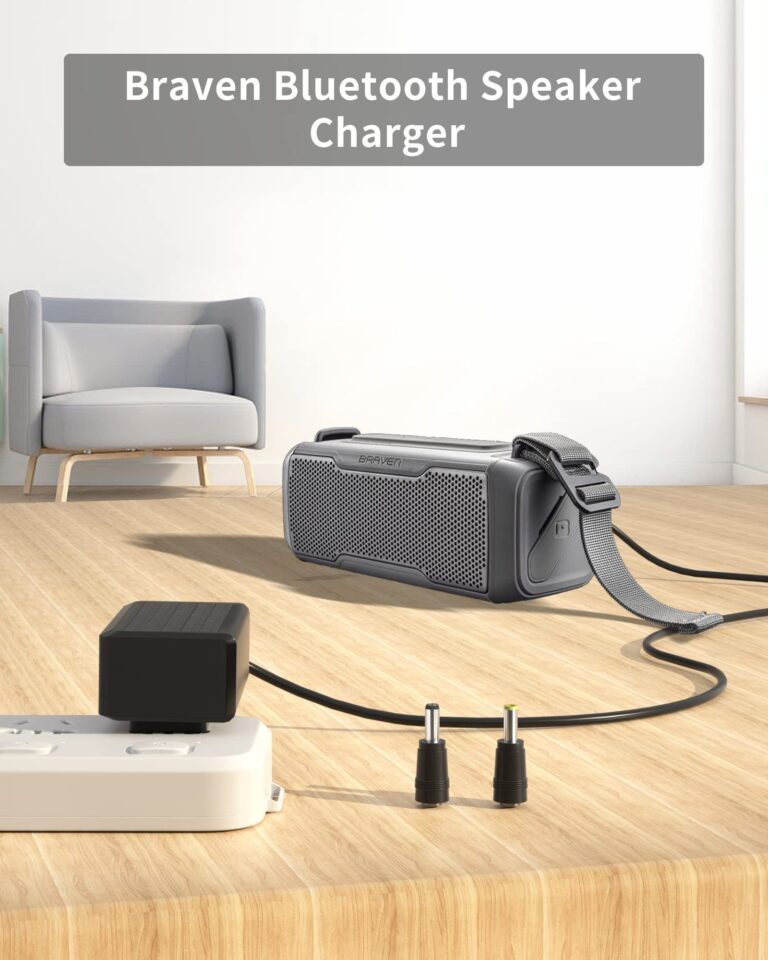
The next step is to identify the charging port on the Auto Drive Charge Pal with Speaker. The charging port is usually located on the side or the back of the device. It is often labeled with a small icon indicating the power input.
3. Connect the USB Charging Cable
Once you have located the charging port, take the USB charging cable and plug the smaller end into the charging port of the Auto Drive Charge Pal with Speaker. Ensure that the cable is inserted firmly and securely.
4. Connect to a Power Source
After connecting the USB charging cable to the Auto Drive Charge Pal with Speaker, the next step is to connect the other end of the cable to a power source. This can be done in one of the following ways:
- If you are using a wall adapter, plug it into a wall outlet and connect the USB end of the cable to the adapter.
- If you are charging from a computer, locate an available USB port and connect the USB end of the cable to it.
5. Start the Charging Process
Once the Auto Drive Charge Pal with Speaker is connected to a power source, the charging process will begin automatically. You may see a light indicator on the device that shows it is charging, or the device itself may have a display screen that indicates the charging status.
5.1 Monitor the Charging Progress
While the device is charging, it is a good idea to periodically check the charging progress. This can be done by looking at the charging indicator on the Auto Drive Charge Pal with Speaker or by checking the battery level if it is displayed on the device.
6. Disconnect and Store
Once the Auto Drive Charge Pal with Speaker is fully charged, it is important to disconnect it from the power source. This will prevent overcharging and extend the lifespan of the device.
6.1 Safely Remove the Charging Cable
Before disconnecting the charging cable, make sure to safely remove it from the power source. If you are using a wall adapter, unplug it from the wall outlet first. If you are charging from a computer, safely eject or remove the USB device to prevent data loss.
6.2 Store the Auto Drive Charge Pal with Speaker
After disconnecting the charging cable, store your Auto Drive Charge Pal with Speaker in a safe place. Keep it away from extreme temperatures, moisture, and direct sunlight to ensure its longevity.
Charging your Auto Drive Charge Pal with Speaker is a straightforward process that can be easily accomplished by following the steps outlined in this article. By taking the time to properly charge and care for your device, you can enjoy uninterrupted music and keep your electronic devices powered up while on the move. Remember to keep the necessary equipment handy, connect the charging cable correctly, monitor the charging progress, and store your device properly after charging. With these simple guidelines, you can ensure that your Auto Drive Charge Pal with Speaker is always ready for your next adventure.
Frequently Asked Questions
How do I charge the Auto Drive Charge Pal with a speaker?
To charge the Auto Drive Charge Pal with a speaker, please follow these steps:
Can I charge the Auto Drive Charge Pal and the speaker simultaneously?
Yes, you can charge both the Auto Drive Charge Pal and the speaker at the same time. Simply connect them to their respective charging cables and plug them into a power source.
What type of charging cable is required for the Auto Drive Charge Pal and speaker?
The charging cable required for the Auto Drive Charge Pal and speaker depends on their specific charging ports. Please refer to the user manual of each device to determine the appropriate charging cable to use.
How long does it take to fully charge the Auto Drive Charge Pal and speaker?
The charging time for the Auto Drive Charge Pal and speaker may vary depending on their battery capacity and the charging speed of the power source. It is recommended to refer to the user manuals of the devices for estimated charging times.
Is there an indicator to show when the Auto Drive Charge Pal and speaker are fully charged?
Some models of the Auto Drive Charge Pal and speaker may have built-in indicators to show the charging status. It is best to consult the user manuals of both devices to determine if they have such indicators.
Can I use a wireless charger to charge the Auto Drive Charge Pal and speaker?
The use of a wireless charger to charge the Auto Drive Charge Pal and speaker depends on their compatibility with wireless charging technology. Please check the specifications or user manuals of both devices to see if they support wireless charging.
Final Thoughts
To charge the Auto Drive Charge Pal with Speaker, follow these simple steps. First, locate the charging port on the device. It is usually located on the back or bottom of the speaker. Next, connect the charging cable to the port and plug the other end into a power source. Ensure that the power source is working and providing electricity. Once connected, the device should start charging automatically. Keep an eye on the battery indicator to track the progress. It is important to charge the Auto Drive Charge Pal with Speaker regularly to ensure uninterrupted usage. Remember to always use the provided charging cable for optimal results. Now you know how to charge the Auto Drive Charge Pal with Speaker effortlessly.